How LambdaTest makes it easy to run Browser Automation

At AVEQ we’re measuring the performance and quality of web pages, including those that play video. It’s in the nature of those pages that they constantly change — be it minor CSS updates or complete overhauls. To ensure that our measurement solutions keep working as intended, we perform regular tests on those websites to see if anything has changed.
We used to do this manually, which was quite time-consuming and tedious. But then we discovered LambdaTest, a cloud-based cross-browser testing platform that made it easy to automate our tests. In this post we’re going to show you how it saved us plenty of time — and how you can use it.
The problem
The way in which we measure video quality is actually quite simple, conceptually. We open a browser (Chrome), navigate to a website that contains a video, play it, and measure what’s happening.
It’s important that we navigate to the right video, and that we can get there even if we don’t know the actual URL of the video. For example, our customer might want to specify a certain TV channel name, or a video asset ID, and it’s our job to click through the catalog to play it. To navigate, we use Selenium. It attaches to a running browser and instruments it to click on certain links or buttons. (Selenium was an obvious choice for us in the beginning; alternatives like Playwright also seem quite useful.)
We use GitLab with its integrated CI/CD solution to run nightly tests to verify the correct functionality of our software. The problems we faced were the following:
- Installing the browser (in Docker!)
- Running it as a non-root user
- Doing screen recordings
- Performing the test with various operating systems
- Testing in various locations
- Parallelizing the approach
Firstly, Chrome (or Chromium) doesn’t like to be run inside Docker. We’ve actually explored that in a previous post. The package has many OS-level dependencies and pulls several hundred MB worth of data. You can cache this in your CI jobs, but the overhead for running a simple test either becomes quite large. Or you can use other prebuilt images with Chrome inside Docker — that’d mean you’d have to run Docker in Docker in Docker with GitLab Runner. Sounds like Inception? Yeah … also, Chrome does not like to be launched as a root user under Linux, which puts further restrictions on a Docker image.
The second issue is that in our case, we sometimes need screen recordings to make sure video is playing, or to debug issues with navigation. We would normally use a virtual display rather than run Chrome in headless mode (e.g. with Xvfb), since headless Chrome does not support all features of its GUI-based counterpart. In particular when it comes to playing video, you need a real GUI. But this becomes hard to integrate in the CI/CD chain, and we’d rather have a solution that provides screen recordings for us.
Lastly, you can easily run this kind of test locally on your machine, even with Docker, but obviously it becomes harder to test all browser combinations. Unless you have days to spend, with browser windows popping up all over your computer screen. And maybe your customer has their services offered in a particular country, so you cannot even test it locally anymore. You could use a VPN solution, but we didn’t want to have to set up worldwide VPN access for each developer.
Our first approach
Let’s take a simple example. Here, we’re using Node.js with the selenium-webdriver package. We want to open YouTube and fetch all the videos from the Trending page, which has several tabs. Here’s a template for how we would have started this, using TypeScript:
import webdriver, { ChromiumWebDriver, until, By } from "selenium-webdriver";
import chrome from "selenium-webdriver/chrome.js";

class DriverTest {
  protected _driver: ChromiumWebDriver;

  async init() {
    const opts = new chrome.Options();
    opts.addArguments(
      "--disable-gpu",
      "--no-sandbox",
      "--disable-dev-shm-usage"
    );
    const chromeDriverBuilder = new webdriver.Builder()
      .forBrowser("chrome")
      .setChromeOptions(opts);
    this._driver = (await chromeDriverBuilder.build()) as ChromiumWebDriver;
  }

  async run() {
    await this._driver.get("https://www.youtube.com/feed/trending");
    await this._driver.wait(
      until.urlContains("https://consent.youtube.com"),
      10000
    );
    const acceptAllButton = await this._driver.findElement(
      By.css('button[aria-label="Accept all"]')
    );
    await acceptAllButton.click();
    await this._driver.sleep(1000);
    const tabs = await this._driver.findElements(
      By.css('#tabsContent [role="tab"]')
    );
    for (const tab of tabs) {
      // do something with the videos
    }
  }
}

const test = new DriverTest();
test.init().then(() => test.run());
You can see how Chrome is initialized with a few extra options. You can find more recommendations for such flags here. Those come in handy for automation purposes because we don’t need all Chrome features.
After initializing the browser, we navigate to the Trending page, accept the cookies, then list the available tabs via a CSS selector. What you do with the content is up to you; in our case we simply check that we can actually get to the tabs, and later might extract a list of video titles.
When you run this test, it works fine on your machine, but it has all the limitations as noted above. How can we put this inside a Docker container? How do we launch this on multiple machines, in different countries? How do you do a screen recording?
The solution — LambdaTest to the rescue
Luckily, there’s a solution: LambdaTest. They have a cloud-based platform that you can connect to with a tunnel, or directly through your code. It basically exposes a Selenium service on your local machine that your code can connect to. You don’t have to launch the browser; they do it for you. It takes only a few minutes to set up and is a drop-in replacement for your local tests.
First of all, you need to create an account. It’s free to start with. Head to LambdaTest.com and sign up. (Note that we are using affiliate links here, but we haven’t been sponsored by LambdaTest in any way. We simply like the product!)
Now, generate the settings for your Selenium driver. Go to the capabilities generator and first select the language (Node.js in our case). Now choose the browser, operating system, and geolocation. You can pick any build name, automation project name, and test name — these help us filter out the results later. You can even choose to perform screen recordings, which helps you troubleshoot issues.
In our instance, we’ve selected Germany (“DE”) as a country, and chose to record a video (“video: true”). Copy-paste the generated configuration JSON and add it to your code.
async init() {
  const capability = {
    browserName: "Chrome",
    browserVersion: "108.0",
    "LT:Options": {
      username: process.env.LB_USERNAME,
      accessKey: process.env.LB_ACCESSKEY,
      geoLocation: "DE",
      video: true,
      platformName: "Windows 10",
      resolution: "1920x1080",
      timezone: "UTC+01:00",
      build: "youtube-top-10",
      project: "youtube-top-10",
      name: "youtube-top-10",
      w3c: true,
      plugin: "node_js-node_js",
    },
  };
  this._driver = (await new webdriver.Builder()
    .usingServer("https://hub.lambdatest.com/wd/hub")
    .withCapabilities(capability)
    .build()) as ChromiumWebDriver;
}
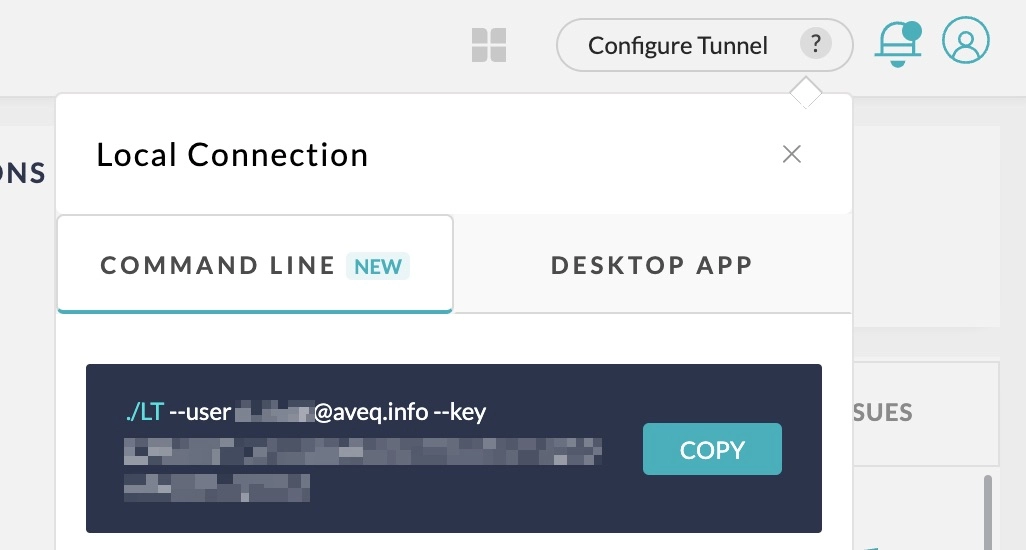
Our initialization function has simply become this. Note that instead of adding our username and access key to the code, we are using environment variables. This is recommended, since you don’t want to commit your secret data in a repository. If you need to find your username/access key, head to the LambdaTest dashboard and copy it from the top right:

Run the code again. It will execute on a LambdaTest instance in Germany! This all took us five minutes, and worked flawlessly. Now, we can run this test in any country we want, simply by choosing the desired location in the LambdaTest settings. We can also pick any browser (version), and any OS. This helps us in case using Windows or macOS may lead to different pages being rendered for the end-users.
Automating everything at AVEQ
When we add more tests, they can be run in parallel, on different LambdaTest instances. To do so within our GitLab CI/CD pipeline, we’ve built a simple Node.js script out of the basic template above. It not only takes the username and access key as environment variables, but also specifies the country and browser, for example.
Then you can use the fact that GitLab CI jobs within the same stage always run in parallel. So, for every browser/country, we specify a separate CI job in one stage. These will be launched in parallel and run on LambdaTest. We could scale this approach infinitely, although you have to pay more for more parallel executions with LambdaTest.
In our case, we use the results of the test to do simple checks, which in turn make the GitLab CI jobs pass or fail. Basically, if one of your Node.js scripts returns a nonzero exit code, you know something is wrong. This might be the easiest way to check if your assumptions about a website (e.g., the CSS classes you use to navigate) are still correct.
Checking the results in detail
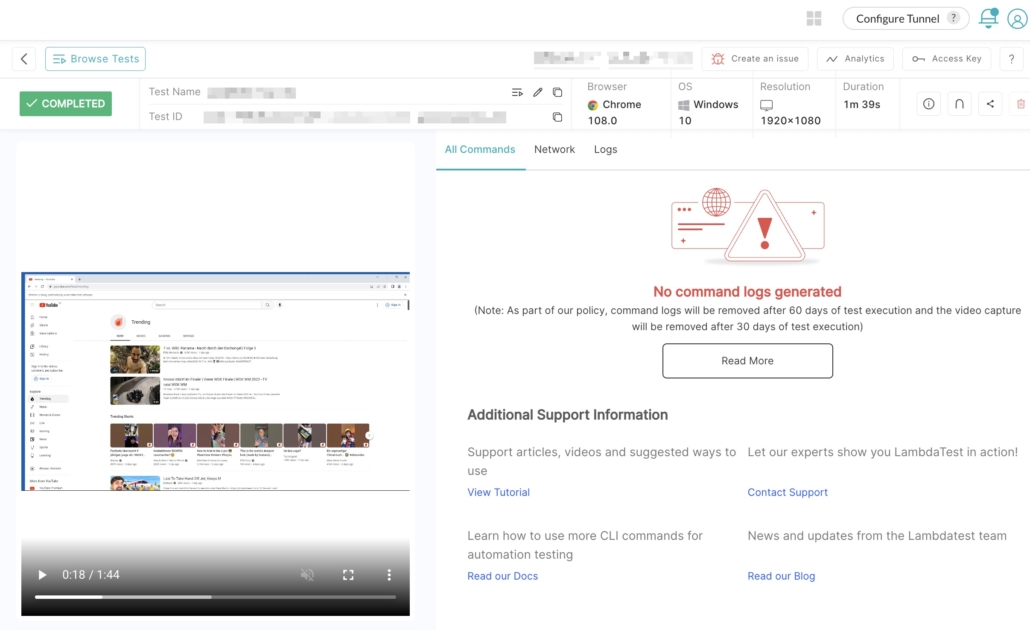
What if something goes wrong during a test? LambdaTest shows you the results for every test in their dashboard. Head to Automation → Builds, and you will see a list of all individual jobs you ran. You can click those jobs and check their screenshot, or even download the entire screen recording.

These dashboards are useful in case of job failures, because you can access all troubleshooting information. In fact, when you enable network tracing, you can even see which requests were made.
What else is there?
To be honest, we actually only use a limited feature set of LambdaTest. They offer much more, like automating real devices (e.g. for mobile app testing), checking websites directly, or orchestrating tests to speed up execution (which they name HyperExecute), et cetera. While admittedly the interface feels overwhelming in some places, we’re still quite happy with the service. It saved us days of precious developer time.
We should add that support was very good. The folks from LambdaTest proactively reached out to ensure we were happy customers. We can recommend them as you can talk to real people when you run into issues — no need to go through layers of support to get an answer. And when we did have a problem, they sorted it out quickly. Of course there alternatives. BrowserStack comes to mind, but they’re more expensive, and the cost wasn’t worth it for our use case.
Let us automate your performance testing
Here at AVEQ, we want to help you test your apps and websites before they go to production. If you are already using browser automation (with Selenium or other tools), our video quality measurement libraries can be directly integrated into your platform. This allows you to not only ensure a website is accessible and loaded, but that your video actually plays and does so in high quality.
Get in touch if you want to find out more, or if you want to see a demo of how a browser-based video quality test could look like.


